Installation
Pre-Installation Guidelines:
- Prior to installation of printed graphics, we recommend attaching a small piece of CLEAR FOCUS film to glass as a test to help you become accustomed to the film's characteristics, including adhesion strength.
- Glass surface must be clean. Use mild soap and water to clean the glass. Do not use glass cleaners with solvents (e.g., Windex®). Use 85% isopropyl alcohol, if desired, to remove any residue; allow it to evaporate completely before installing film.
- Surface must be completely dry. Use lint-free cloth or industrial paper towels to dry glass.
- Temperature of glass must be moderate —between approx. 40º F (5º C) and 90º F (32º C).
- In cold weather, apply film in late afternoon, after windows have warmed up, or, in the case of a vehicle, in a garage or other enclosed area (with the vehicle engine turned off). Applying film to glass that is too cold may adversely affect adhesion of film.
- In hot weather, apply film in the early morning, while glass is still cool. Applying film to glass that is too hot can cause the film to stretch during installation.
Step 1
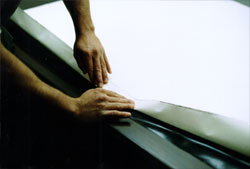
Lift the upper edge of the liner away from the vinyl and fold back approximately 3-6 inches (depending on the size of the graphic).

Step 2
Carefully position the film so that it is properly aligned on all sides, then press the upper corners in place using light pressure.
Step 3
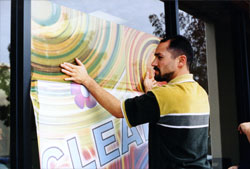
Using your hand or a soft plastic squeegee, lightly press the film in place.
Step 4
Working from the top of the graphic to the bottom, continue by peeling away more of the liner and applying light pressure to the film. Continue in this manner until the liner is completely removed and the window graphic is in place.

Step 5
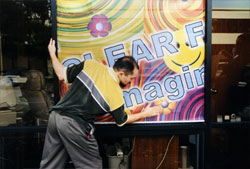
Using a utility knife, carefully trim away any unneeded portion of the graphics.

Step 6
If you are installing more than one panel, follow steps 1 through 5 for each panel. Properly align each graphic in relation to the adjoining panel(s).
In the case of graphics that must be seamed together, install the two pieces so that the edges of the film butt against each other, with the holes aligned (don't overlap the two edges of the film).
Step 7
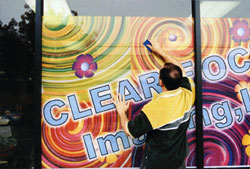
Finally, squeegee the film from the center and work outward in all directions. Be sure to squeegee the edges firmly in place.

Step 8
Step back and admire your work!